The first tidbit of knowledge will need to be how the Title fields are parsed out. Start by opening the dirxml.js file. This file is what actually parses up the Novell Audit fields and stuffs them into the fields. It can be a little confusing at first though. Here is a sample from dirxml.js:
String.prototype["Y-Entitlement"] = function(e){The first part to break apart is the "Y-Entitlement" portion. Lets reference back to our LSC file and how those messages were built, we have two things, the list of field titles and the letter to data references:
rec.data = this;
}
#EventID,Description,Originator Title,Target Title,Subtarget Title,Text1 Title,Text2 Title,Text3 Title,Value1 Title,Value1 Type,Value2 Title,Value2 Type,Value3 Title,Value3 Type,Group Title,Group Type,Data Title,Data Type,Display Schema
# Value (V):If you look at a sample data piece:
# R - Source IP Address
# C - Platform Agent Date
# A - Audit Service Date
# B - Originator
# H - Originator Type
# U - Target
# V - Target Type
# Y - SubTarget
# 1 - Numerical value 1
# 2 - Numerical value 2
# 3 - Numerical value 3
# S - Text 1
# T - Text 2
# F - Text 3
# O - Component
# G - Group ID
# I - Event ID
# L - Log Level
# M - MIME Hint
# X - Data Size
# D - Data
#1200Our code from dirxml.js reads "Y-Entitlement", which means if the Y (Subtarget) field, which is the 5th field of the message, is equal to "Entitlement", use this parsing method. If you look elsewhere in the file, you will find other keywords for all of the different fields and a parsing method for that field.
000304B0,Account Create By Entitlement Grant,Driver DN,Target Account DN or Association,Entitlement,Src Identity DN or GUID,Detail,IDM EventID,Status,N,,,Version,N,,,XML Document,S,Status $ST:$SB object:$SU level:$SY objet-type:$SS event-id:$SF from $iR
The next piece to determine is:
function(e){This is relatively simple, it is taking the data (e) and storing it in rec.data. But, the only problem is, what is rec.data? We next need to look at the Rec2Evt.map file in our collector. It has a bunch of values, such as:
rec.data = this;
}
DataValue,dataThis file indicates that rec.data is stored in the Sentinel Database field known by "DataValue". There are a limited number of fields in the Rec2Evt.map file, so if the field you are looking for is not there, the Evt2EvtData.map file seems to have a full listing of all Sentinel Database fields. You can call the collector portion anything you want, it must simply match the code in dirxml.js.
Now, to tie everything together, we will need to update a couple of files to get a new custom field. So, lets jump back to our example:
#1200If we wanted to change the SubTarget field to be stored in say, CustomerVar95 (reference http://www.novell.com/documentation/sentinel61/s61_reference/?page=/documentation/sentinel61/s61_reference/data/bgqshxm.html to ensure you are not using a reserved field), we would simply extend a few files. First, we change our sample in the LSC file to read:
000304B0,Account Create By Entitlement Grant,Driver DN,Target Account DN or Association,Entitlement,Src Identity DN or GUID,Detail,IDM EventID,Status,N,,,Version,N,,,XML Document,S,Status $ST:$SB object:$SU level:$SY objet-type:$SS event-id:$SF from $iR
#1200We extend the dirxml.js file to have a new parse method so it understands how to stored:
000304B0,Account Create By Entitlement Grant,Driver DN,Target Account DN or Association,cv95,Src Identity DN or GUID,Detail,IDM EventID,Status,N,,,Version,N,,,XML Document,S,Status $ST:$SB object:$SU level:$SY objet-type:$SS event-id:$SF from $iR
String.prototype["Y-cv95"] = function(e){We need to update the Event map so it knows what rec.cv95 actually refers to:
rec.cv95 = this;
}
CustomerVar95,cv95We need to update custom.js to include the newly updated files to be loaded as well:
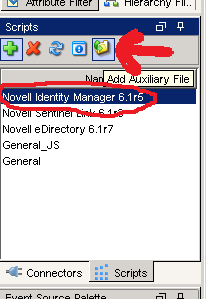
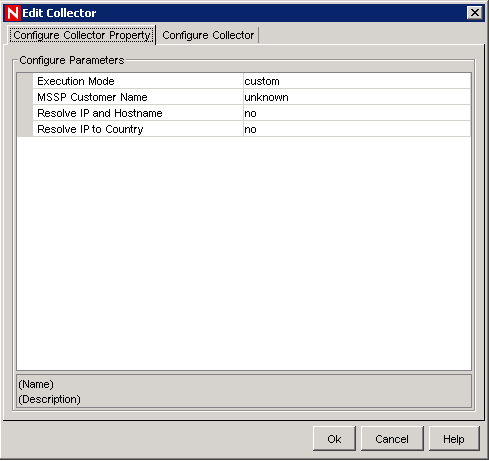
Collector.prototype.customInit = function() {We add these into the collector, ensure the collector is set for custom mode, then restart the collector manager for the changes to take effect (please see part 2 for this procedure).
// load additional maps, parameters, etc
var file = new File(instance.CONFIG.collDir + "rk4idm.lsc");
var file = new File(instance.CONFIG.collDir + "taxonomy.map");
var file = new File(instance.CONFIG.collDir + "dirxml.js");
var file = new File(instance.CONFIG.collDir + "Rec2Evt.map");
return true;
}
This process can be used for completely custom events as well. You can use the generate-event token, assign values 1000-1999 in events and pass the data. When you build tokens and pass them, they will be in the appropriate audit fields and this is a good step for peeling the data out and stuffing into the proper sentinel fields in the database.
As stated before, I highly recommend keeping your code adjustments in specifically commented sections of the files. Keep in mind that if the customer upgrades the collector, your code will need to be migrated to the newer versions of the files.